The importance of reconnaissance in vulnerability discovery and penetration testing is usually overlooked. Network security personnel with little training or experience will often begin their analysis by finding a few target systems and immediately attempt to compromise their security with user/password logins and vulnerability penetration tests. These premature attempts to compromise pseudo-random hosts are likely to trigger alerts on intrusion prevention systems, firewalls, and host-based security controls.
This is a mistake. The criticality of reconnaissance cannot be overstated. That’s why the more experienced penetration testers take a slow and methodical approach to hacking. They know that identifying networks, hosts, and services is much easier to do before an attack begins and allows them to attack only targets that are likely to produce the desired outcome.
One of my favorite tools for performing reconnaissance is SuperScan, a GUI tool developed by Foundstone and now owned by McAfee.
Using SuperScan
SuperScan can be used for either internal or external network reconnaissance. I prefer it for internal scanning as it tends to do a good job with NetBIOS and other Windows LAN-oriented enumeration.
SuperScan is a free tool that can be downloaded from SuperScan v4.1. It requires no installation, so you can just unzip it and launch SuperScan as shown in Figure 1.

Figure 1. The default SuperScan startup screen.
Note that if SuperScan gives you an error, you may need to run it as an Administrator. To do that, simply right-click the exe file and select Run as administrator as shown in Figure 2.
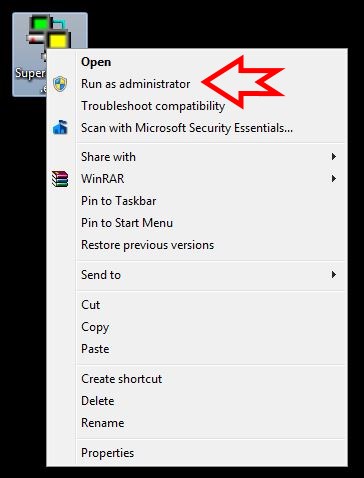
Figure 2. Running SuperScan as admin.
To reconnoiter a network, simply type in a valid IP address range in the Start IP and End IP address fields and click the right-arrow button to move that range into the IP range selection box as shown in Figure 3.
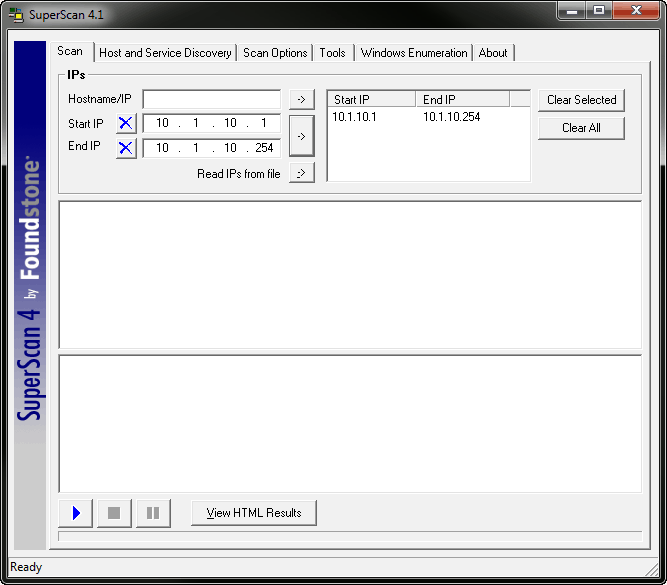
Figure 3. SuperScan has a valid IP address range.
I’m going to use 10.1.10.1 through 10.1.10.254 here, a valid range on my network. Once I press play in the bottom left corner, SuperScan does its thing.
By default SuperScan begins with a ping sweep, which often sets off external intrusion detection systems but is frequently ignored on internal networks. The results of the initial ping sweep (here called Host discovery ICMP (Echo) scan) are shown in Figure 4.
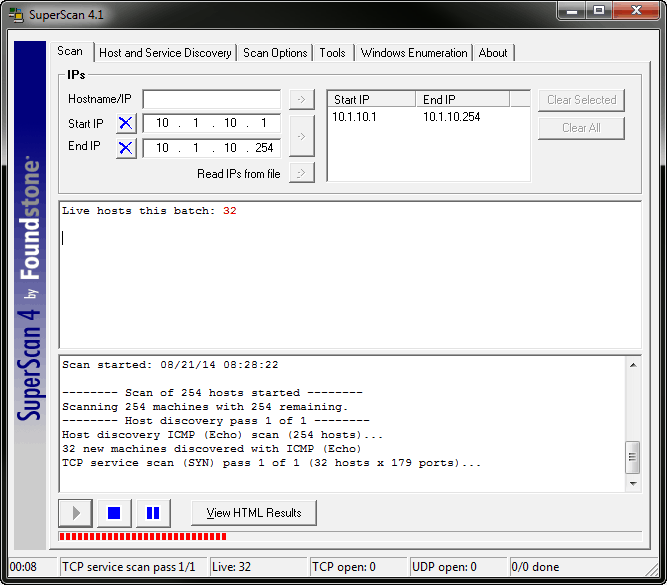
Figure 4. Targeting 10.0.1.1 with SuperScan.
Once all hosts in the range are discovered, SuperScan begins interrogating them for open ports, service names and versions, and more. The options for what interrogations are performed are available under both the Host and Service Discovery and Scan Options tabs as shown in Figures 5 and 6.
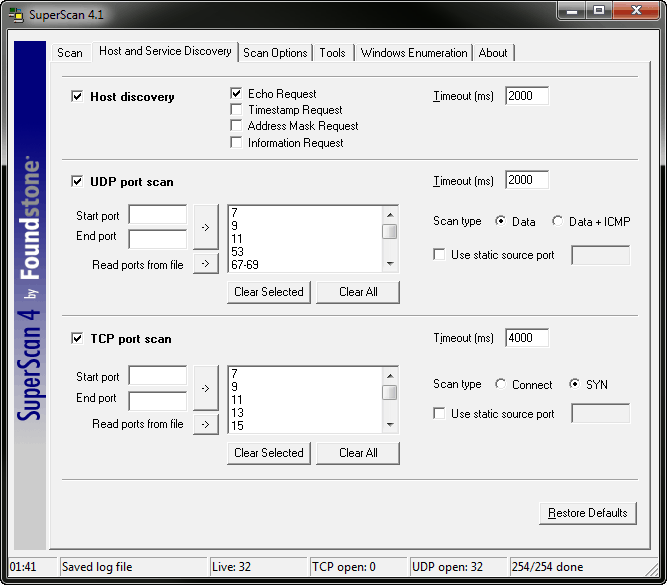
Figure 5. The default Host and Service Discovery options for SuperScan.
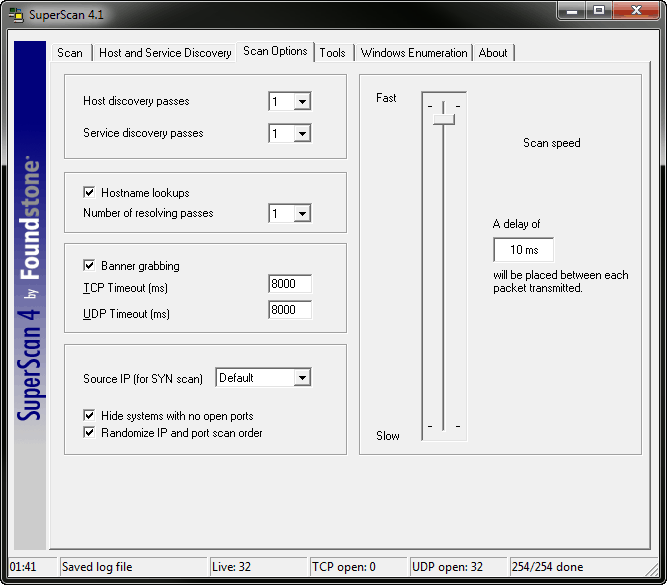
Figure 6. The default Scan Options for SuperScan
Between the ping sweep, port scan, and banner grab, SuperScan collects and displays an extremely useful list of potential targets for penetration testing.
What Do I Do With This Test?
Once you’ve conducted the test you will have a fairly complete list of active network hosts and the services running on those hosts. Although the list is probably not complete, you can use it to either begin selecting targets for further penetration testing or begin probing for other hosts based on the data you’ve collected.
So now you know how to use a free tool to reconnoiter your internal network. And knowing is half the battle!
Stay safe!
enoK -CISSP / MCSE / PMP
Interface Technical Training – Technical Director and Instructor