How to Enable Virtualization in Windows 10
Posted on: Aug 21, 2019
In computing, virtualization refers to the act of creating a virtual version of something, including virtual computer hardware platforms, storage devices, and computer network resources
A virtual machine emulates a computer system so anyone can run different operating systems and programs. It works great for testing out new features without risking your current settings. You will also be able to test software compatibility in an isolated environment.
Running a virtual machine can be demanding and not all computers are capable of doing so. But these days, users can create one using Windows 10.

What Do You Need?
Your computer needs to meet a couple of requirements for you to be able to create and run a virtual machine. Here’s what you’ll need:
- A 64-bit processor that has Secondary Level Address Translation or SLAT. Find info about your processor using these tools.
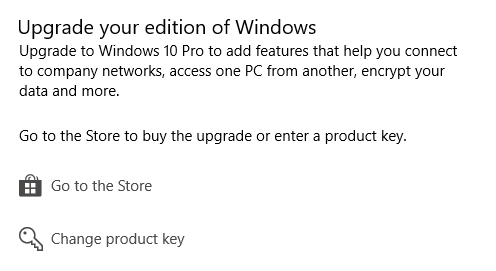
- Windows 10 Pro, Education, or Enterprise.
Note: Windows Home users can upgrade to the Pro version. Go to Settings (Windows + I) > Update and Security > Activation.
- At least 4 GB of memory. Having more RAM would be better.
- A BIOS setup where virtualization has been enabled.
- Hard drive space for the OS you’ll be adding.
What is Hyper-V?
Windows 10 uses a software called Hyper-V to handle virtualization. You will need to activate it if you want to add virtual machines. Some Hyper-V features include being able to run operating systems and entire hardware components like hard drives and network switches.
Advanced users can even use it for server virtualizations if they want.
Turn On Virtualization in BIOS
First, restart your computer. As the computer boots, press the corresponding key that lets you enter BIOS. The button differs from one PC to another. However, it’s usually F10, Delete,or the F2 key.
Once you enter the BIOS, you can start enabling virtualization settings. The BIOS interface varies depending on the brand.
Exit once you’re done making all the changes to the BIOS settings and restart your PC.
Turning On Hyper-V
You will need Hyper-V to manage your virtual machines. This can be done by accessing the Control Panel or PowerShell.
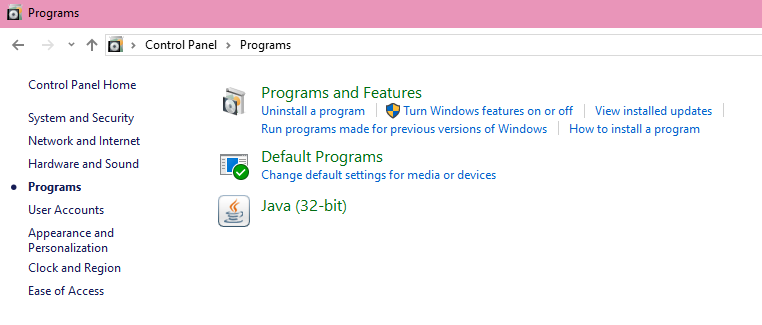
Control Panel
Open the Control Panel. Now go to Programs and Features > Turn Windows Features On or Off.
Search for a folder called Hyper-V. Tick all the subfolders under Hyper-V and hit OK.
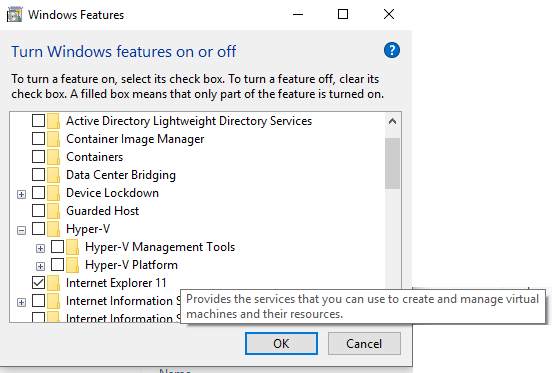
Windows will then try to configure Hyper-V. This might prompt a restart after it confirms all the changes.
PowerShell
Open PowerShell and enter the following line:
Enable-WindowsOptionalFeature -Online -FeatureName Microsoft-Hyper-V -All

If PowerShell responds and says that the command cannot be found, make sure you’re running it as an administrator. Restart the computer after you’re done.
Creating a Virtual Machine
Once ready, you can start using Hyper-V to create virtual machines in Windows 10. Here’s what you need to do:
Go to Control Panel > Administrative Tools and double-click Hyper-V to launch the application.
On the left-hand pane of Hyper-V, select the name of your computer so you can work on it. You can add a new virtual machine by going to Action > New > Virtual Machine.
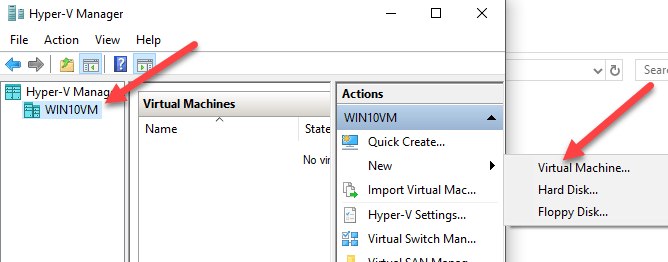
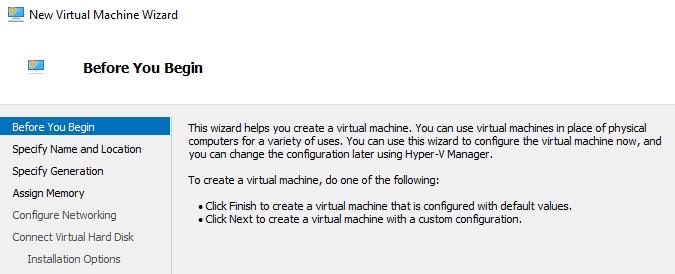
A new window will open called New Virtual Machine Wizard. Complete the steps and click Finish when you’re done to create a new machine.
New machines will be shown inside Hyper-V. The same application is used to control the machines. For example, you can turn the machines on and off through Hyper-V.